Search This Blog

Showing posts with label Soil. Show all posts

Wednesday, August 26, 2020

Fast and Furious

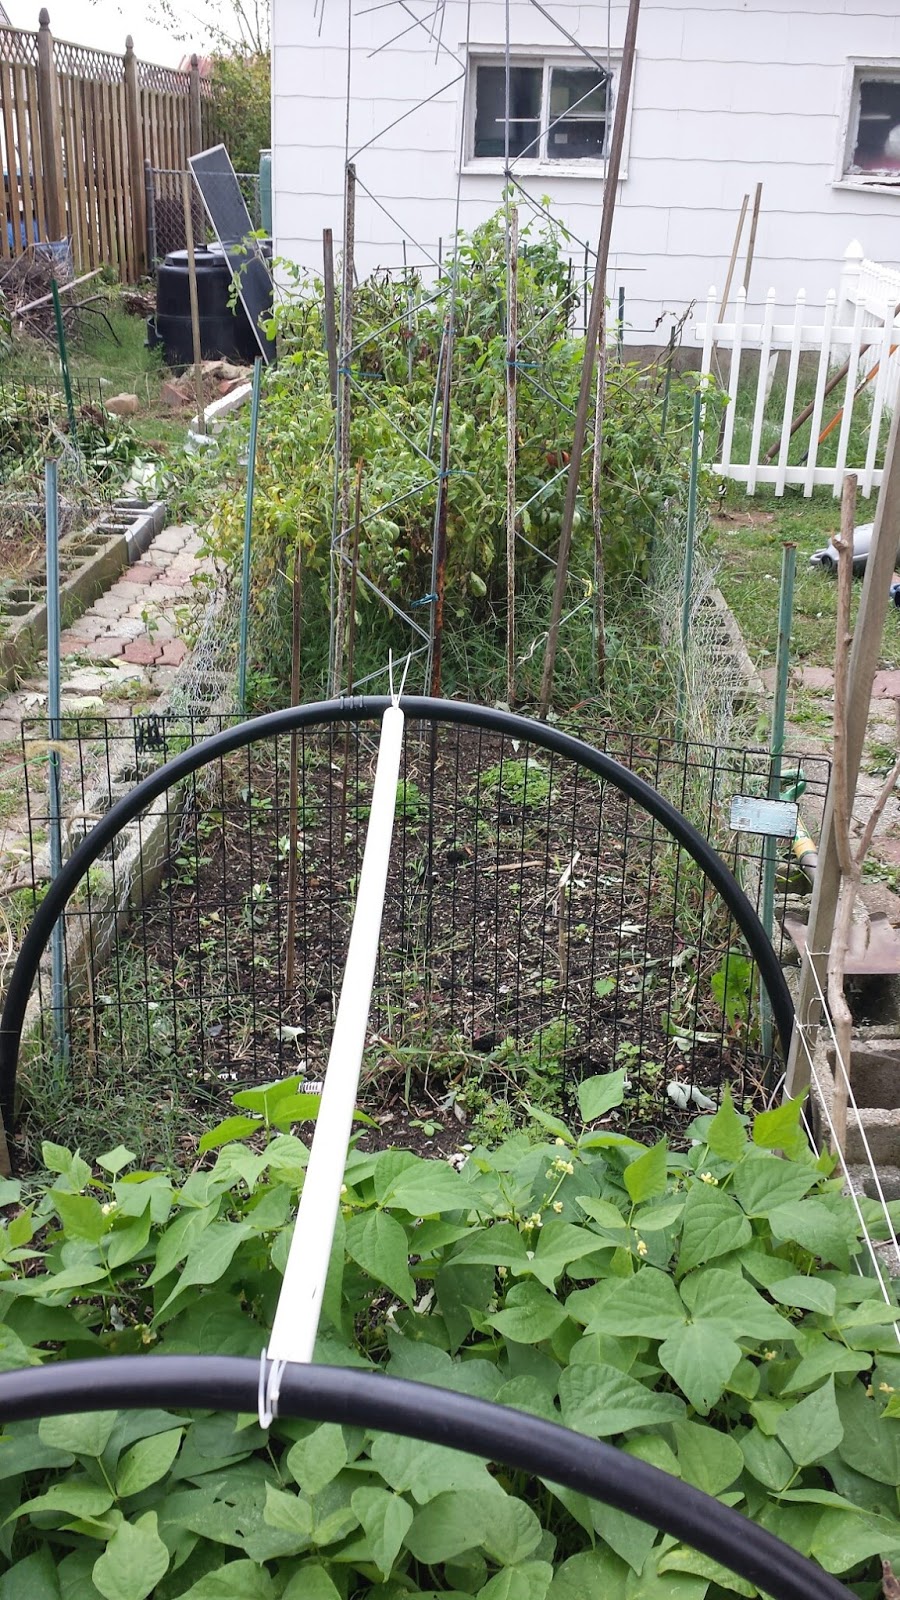
Things are moving fast and furious here. Fall is inexplicably fast approaching or so it feels. I guess it's just that there is a lot of work to be done and time is going by fast. I have begun the lettuce and chard plants in the greenhouse planters along with seeding in the Winter Rye in one garden bed. I am a little early with the rye but I do have my reasons for this.
The primary reason is that I did not get a crop planted early enough last year and it was what I would call feeble. There were patches of it but not what I would call vigorous. This affected this years crops and resulted in failures I am not accustomed to. The second reason is that the outlook for fall is, from what I can discern, colder than normal. If I delay the planting into this weather, the Rye will not be as healthy as I need. There are two components to the Rye. The first is the top growth which will help stabilize the surface of the soil. For farmers, this is important to control soil erosion. For me, it's more about weed suppression in the spring. The second aspect is root growth and penetration. With the warmer weather I am currently planting into, the roots will be more voluminous and longer. When the Rye is cut in the spring, the roots die and leave aeration pathways for the plants roots to develop. It also softens the soils composition. I should see the results next year.
As I said earlier, I planted my seeds for lettuce in the greenhouse planters. I began by spacing the plantings according to the instructions I found on line. I made holes where the seeds were going to be planted. After this, I filled each divot with vermiculite and watered it down. Then I placed the seeds into the vermiculite and watered them in to make sure the seeds were moist. I followed this by spreading a thin coat of vermiculite over the seeded area and moistening it again. I have been doing this for many years with good success. I adapted this from a procedure I learned while using the Square Foot Method. Here is a picture after planting the first four varieties of lettuce. 
Thumb of 2020-08-21/grdnguru/8236fc
I used the same method on one of my round planters to start a chard plant. I thought that Chard needed a deeper planter but as it turns out, from research I did after starting this plant, they actually do quite well on shallower planters. So, lesson learned. Here is a picture of this plant/planter.
Thumb of 2020-08-21/grdnguru/93bacb
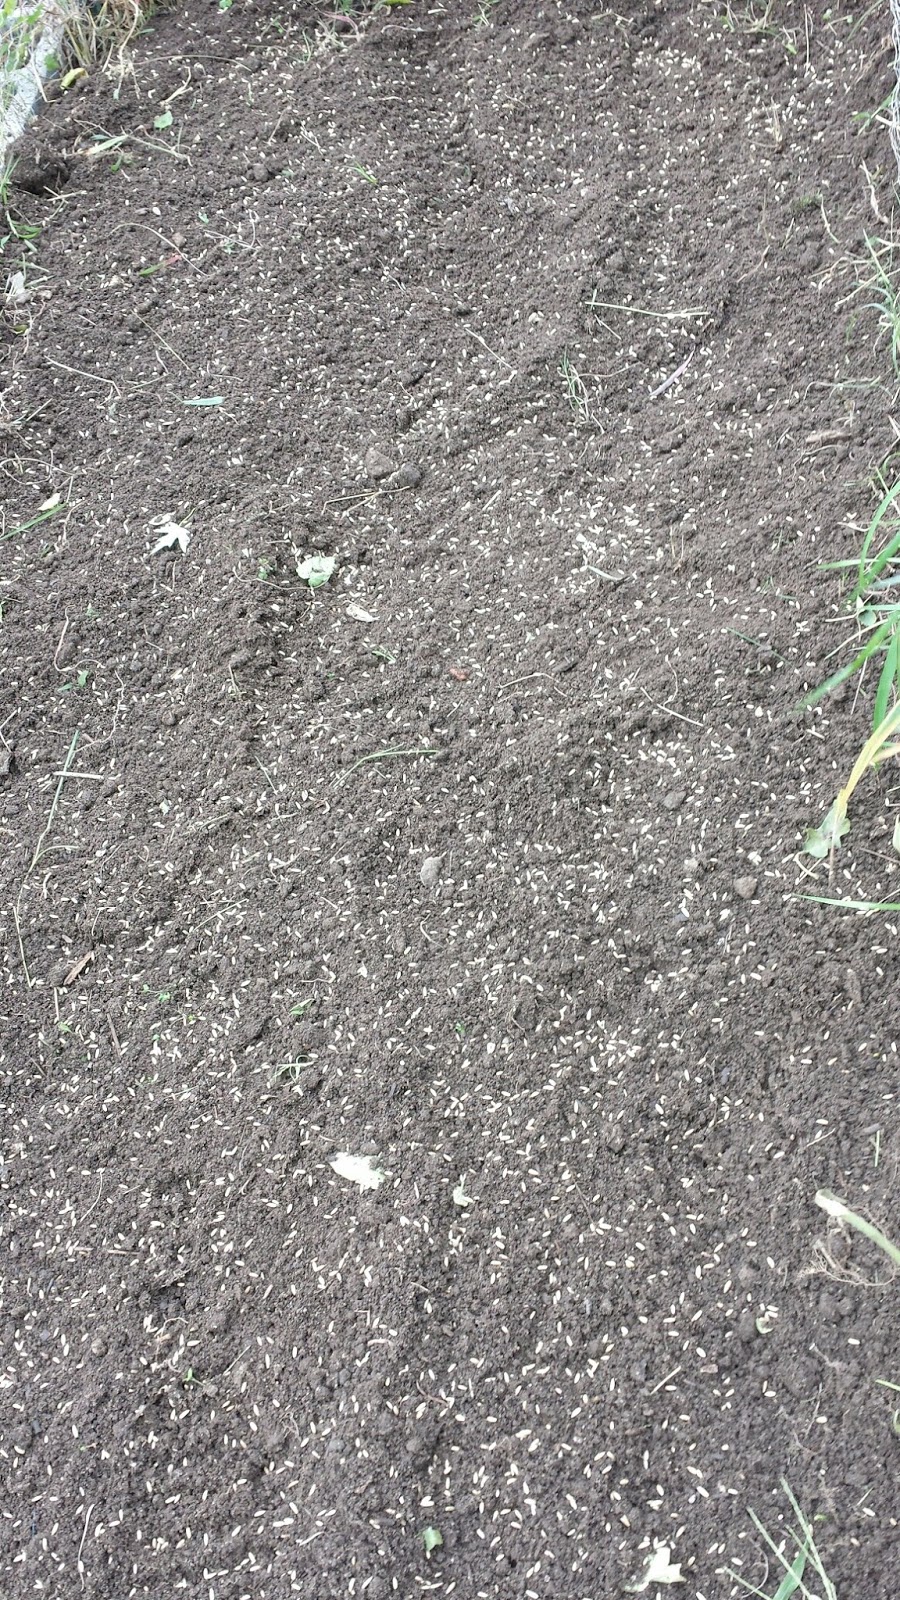
Later in the evening, I seeded Rye into one of my beds. I started by raking the soil to loosen the surface tension. Next, I watered the soil with a fine mist and then spread the seed as evenly as possible. I did use a little more seed than usual as I want a very dense growth this year. I then took a rake and tamped the seed into the soil so it made contact with the ground. After completing the seeding and tamping, I watered the bed down again with a fine mist just to insure the seeds were moistened. After that, I spread a layer of Peat Moss over the bed and watered it down. I followed this with a light coating of more Peat to cover the seeds that emerged when I watered the first layer down. The peat both covers the seeds from birds and keeps the moisture level even.
I will water the bed in the morning, around noon and at dusk in order to assist the germination. You don't want seed to dry out. I won't water as much once the seedlings usually appear in about 5-6 days.
Here is the picture of the finished bed.
Thumb of 2020-08-21/grdnguru/313ca0
My next projects will be to continue with the seeding in of my beds and to plant additional crops in the greenhouse. I think I will start 2 Pepper, 3 Spinach and a row of carrot plants for now. That's all the news at this time. So, until the next post, Happy Gardening everyone!

Saturday, January 18, 2020

Garden renovation update

I was able to get more work completed before the current cold weather struck. That's a good thing too as when I walked out into the backyard yesterday, the ground was hard as a rock. It had no give whatsoever. Guess old man winter has decided to settle in for a while via winter storm Jacob.
After much work, I was able to remove about 240 of the pavers that I had distributed throughout the garden. That number kind of snuck up on me as I did not realize I had that many. It's amazing how that can happen. See, I was able to procure them from two different sources over an extended period of time. Given my propensity to get carried away, it didn't really dawn on me that I had gone so overboard. And, I paid a small price for that as seen from the photo below. To say my back was none the better is an understatement.

Thumb of 2020-01-18/grdnguru/778183

At this point, I have unearthed the area near my shed that was covered by the pavers. This was the most time consuming and intense work I believe I will have to undertake during the renovation. Those bricks were in place for about 5 years so they were firmly entrenched in the mother earth. But, after a consistent and prolonged effort, I am glad to report, this phase is now 100% complete. After removing the pavers, I took my tiller and evened out the bed. I did notice that there were a copious amount of worms poking themselves onto the surface. That was a very encouraging sign given nothing had been planted there for many years. I purposely did not till the whole bed as there are bulbs along the white fence that I want to transplant in early Spring. I will have to till the area again once we are out of winter. Here is the finished product.

Thumb of 2020-01-18/grdnguru/cd8c71

Additionally, I was able to prep the beds against the fence and in the middle of the garden. I have to say that I am impressed with the one wheel tiller as it hasn't had any trouble breaking up the surface soil. I used to use a mantis unit that would clog and needed to be cleaned repeatedly during use. It was just so frustrating. Given the soil I was prepping had ice clumps, I don't believe the Mantis would have been efficient for this scenario. Sometimes, old school just works better. And, I do think that the Mantis was kind of destructive to my soils health. There were a bunch of worms in the two beds coming to the surface and I can only imagine the Mantis would have killed many of those worms. As you can see from the photos, the beds are thoroughly dug into for the initial cut. I will have to make another pass once we warm up.
Thumb of 2020-01-18/grdnguru/c2bc06 Thumb of 2020-01-18/grdnguru/1344f1

After completing these tasks, I decided to clean up one part of my beds that I had neglected to do in the fall. I had several poles, clamps and ties that I left in the beds. I pulled the poles and ties and gathered them up. I guess the grass that was growing there hid the supports as I had way more than I remembered. As shown, that area is now decluttered and ready to be worked. And, I have recovered a fair portion of the ties which I will clean with a bleach solution to kill any bacteria that may be present. 

Thumb of 2020-01-18/grdnguru/c56a02 Thumb of 2020-01-18/grdnguru/fa8a99 Thumb of 2020-01-18/grdnguru/ee3d78
Well, that's where I am now standing in lieu of the ground freezing up at this time. I will have a report on the status of the my greenhouse growing endeavors in the next day or so. Until then, happy gardening everyone!

Sunday, October 4, 2015

Sunday, busy Sunday

I woke up this Sunday morning with nothing really in mind.  Due to a change in my plans, I decided that since Joachin was a bust here in Baltimore, that it would be a great cool day to shut down both of my beds for winter.  That entailed harvesting the final tomatoes and peppers for the year in those beds.  After clearing out the plants, I then raked the beds and cleared out the few weeds that were in the beds.  Then I seeded in the winter rye.
As discussed in my prior post, using winter rye as a cover crop for winter is becoming more accepted by farmers and gardeners alike.  I have found it to be very useful and have seen an increase in the yields over the three years I have been doing this.  There are numerous advantages to doing this.
I follow the same routine every year.  I will detail that here.  Below are pictures showing the progression to get one of my beds ready for rye.


The picture on the left is the beginning condition of the bed.  On the right, it shows the result of pulling the plants and tilling with a tine rake to clear all the debris and weeds from the bed.  Once you get the bed to this condition, you can then seed in the rye seed.  I use a hand spreader as pictured below.
This helps to evenly spread the seeds to reduce the number of bare spaces in the beds.  The result should look like the picture below.

Once you spread the seed, I suggest you should lightly tamp the seed into the soil using a tine rake in order to make sure the seed is in contact with the soil.  It should look like the picture below.  Again, you would lightly tamp them in.  All you want is for the seed to be pressed into the soil.
                                                                                                                                                                    After this is completed, I go one step further.  I would encourage you to cover the seed with peat moss.  I do this for multiple reasons here.  We have a big bird population here which would mean they would easily find and eat enough seed to wipe out a fair portion of what I sowed.  Secondly, unlike other covers such as straw or a bird mesh, the peat moss does not need to be cleaned or taken off the seeds.  It becomes part of your soil.  Peat moss also keeps the soil moist between your watering.  Below are two pictures showing the peat moss as I progressed.


The picture to the left shows half of the bed being covered to give you the contrast between what it started out as and what it should look like after application.  The right picture shows the completed bed.  I make sure as many seeds as possible are covered so as not to attract the birds.  
Once you have all the seeds covered as best as possible, you will then lightly water the beds to wet the seeds.  After you have done this, you need, as in all seed applications, to insure that the beds do not dry out.  One hint I have is to watch the weather and if you can, plant the rye when there is an expected period of rain in the near future.  I have done this a few times and it seems that nature is much better at watering than I am.  I get my best results when I am able to time it in this fashion.
Well, that's about all I have for today.  I will update my rye planting as it develops.
Until then, happy gardening everyone.  


Friday, October 2, 2015

Monticelo - part two.


The above pictures represent what I would describe as the best of the day we spent at Monticello. Going clockwise, there is the screenshot of the official banner that was displayed on all the monitors in the various seminar tents, me beside the statue of Thomas Jefferson, the tent where the soil renaissance seminar was held, the various tents on the main grounds where the vendors were set up, a picture of the early morning fog hanging in the valley beside the Jefferson garden and me with Robert Hatch - the man who brought the garden back and who has written several books on Jefferson's revolutionary garden.


As I said in my earlier post, I am quite pleased that I am doing the best I can for my soil.  For, if your soil is good, it solves a lot of issues for your garden.   But more importantly, it was nice to be with people who shared a common interest and but had different perspectives.  Here I am, in the red shirt, sitting with the various people who were attending the soil renaissance seminar.  It was quite satisfying indeed.
I also attended a seminar on winter gardening during the day.  I have toyed with the idea of growing vegetables in winter to be able to extend the growing season.  And, as I listened to the back and forth about the various techniques and structures that could/should be used, I slowly came to realization that maybe this just wasn't what I wanted to be doing after all.
The discussion began about what plants could be grown over the winter.  That list was, to no surprise to me, very limited.  We first established that it was basically root crops and hardy plants like cabbage, kale, broccoli and a few others that could be successfully grown through winter.  They then explained the need for covering the plants with the spun fiber directly over the bed and then the need to build a support structure once the plants began to grow.  So far, not too bad.  But then, we began talking about bigger structures, blankets, and even greenhouse plastic and the need to build heavier duty structures of various types.  This is where I began to think that this was a lot of effort for what they termed as small output crops.  I mean, in all honesty, in my mind it would be much easier to buy my carrots from the grocery store than to put all this effort to get them fresh from my garden once I shoveled them out and uncovered them.  Exaggeration I know but not too far off the point.
So, this seminar was beneficial in that it confirmed what I learned from trial and error here and there over my time as a gardener.  I can understand a commercial or CSA grower doing this - it's their livelihood.  But for the backyard gardener, unless you are in the south and can avoid the structures, I don't see the payoff.
We spent the rest our time at Monticello wandering through the various exhibitors tents and the grounds.  As we were meandering around the Jefferson garden, I recognized Peter Hatch.  He has written several books regarding Jefferson and the revolutionary garden.  I own 'Thomas Jefferson's Garden Book" and will have to buy 'A rich Spot of Earth: Thomas Jefferson's Revolutionary Garden at Monticello'.  I introduced myself and asked him for a picture which he graciously approved.
All in all, the day was fun for me.  My wife, on the other hand, had her moments but was mostly there to spend time with me as we wandered the grounds.  I would recommend Monticello to any one who is fascinated with gardening and also, the history of our country.  There is much to see on a normal tour and it is very beautiful there.
         

Tuesday, September 15, 2015

Monticello and the Heritage Harvest Festival

My wife and I attended the Festival this past weekend.  We drove down Friday afternoon through the insane traffic that is Washington DC.  We were able to get in to beautiful Charlottesville Virginia, check in to our hotel and then go to the pedestrian mall in the downtown area.  We had been here before but this time was quite different.  It was the home opener for the Univ. of Virginia against Notre Dame.  Guess what color shirt I was wearing - that's right!  Bright green like I was from Notre Dame.  I laid low once I figured that out.
It was a mob scene although it did not seem intense.  I love this little mall as it is quite nice with the blend of eateries and it's quirky stores that populate the mall.  You can eat outside or inside the various restaurants.  There was a nice mix of the students youth from Virginia and the older folks - mostly alumni.  It has an ampitheater on the one end and we listened to the Skip Castro Band for awhile.  We left there just before the UVA pep rally was to start in order to avoid the crush of the people there.
We woke up on Saturday and made our way to Monticello.  When we arrived, it was lightly raining and the mountaintop was covered with clouds and fog.  I had signed up for a Soil Renaissance workshop and a class about winter gardening.  We made our way to the various vendors and perused and purchased a few items from them.  We took in a tomato tasting table from Seed Savers Exchange.  I must say, the chocolate cherry tomato's were delicious.  Only issue I had was that they did not have seed packs for many of the varieties being presented.  Come to find out, they were testing them so they may come available in the future.  I will have to keep an eye out for their catalog to see if any made the cut to packets.
Let me begin the description of what I(we) took in at the festival.  I will begin the same way I tell people to start a garden - with the soil.  Soil renaissance is a group of loosely held organizations that have as their primary goal the education of today's farmer about soil and how to sustain it.  It really was quite interesting to hear the various speakers - one from Soil renaissance, a local farmer, an extension representative from Va., the Monticello chief gardener and a professor from Va. Tech.  All had very interesting points of view and experiences.  While I was sitting listening to each speaker, I was ticking off what I do in my garden as each subject came up.  It was quite gratifying to know that my practices were in line with most of the speakers.  One place I did not mesh with one of the speakers was with the use of herbicides on their crops.  I completely understand that they have a livelihood to protect unlike me.  I garden for the joy of it and not for direct income.  There is a vast difference.
Interestingly, one of the organizations that Soil Renaissance does interact with is the Rodale institute in Kutztown Pa., not far from the Baltimore area. They are pioneers of the organic method and they date back to the early 1950's. According to the SR people, they participate regularly within the SR movement.  Rodale does classes and has tours during the year.  I will have to get up there to see the Institute.  I believe they have over 300 acres of test fields.  They are very cutting edge and I have been reading their website and picking up techniques and such for more than a few years.  If you get the chance and are in the area, it may well be worth the time to go there.
Well, that's all for now.  I will be writing more about this visit but there is so much to tell I feel it needs to be broken down over the next week or so.  I also have pictures which I will also share in the very near future.   If you have any question about this or any other topic, please feel free to leave a comment.  Until next time, Happy Gardening!
  

Monday, March 23, 2015

Continuing preparations

Well, we received another reminder this past Friday that winter is not yet through with us.  It was more of a nuisance than anything else but, nonetheless, it was a snow event.  Today, as I sit out in my back porch, the sun is shining very brightly and its in the mid 40's.  I have been able to get the garden moving in several respects this weekend due to two beautiful days.
In my last post, I mentioned that I planted winter rye and the reasons for doing so.  Last fall (September) I sowed the seed and then covered one of my beds with greenhouse plastic and the other I left to the elements to see if covering it would make a difference.  As shown, the answer is a definite yes as seen by the two photos below.  The top one is of the uncovered bed and the bottom one is of the bed that was under a plastic tunnel all winter.


It was worth the effort to cover them as there is certainly more volume of rye to work into the soil.  I cut the first bed by using my weed trimmer.  I cleaned the trimmer and used new line on the trimmer to prevent any weed transference to my beds from the trimmer.  The picture below shows the bed after this cutting.

I will let this lay for a couple of days as seen and then I work it into the ground through shallow cultivation.  This process allows for the break down of the rye and also leaves the roots system somewhat in tact below. This adds structure and concurrent moisture retention with the gradual breakdown of the roots into the soil.  One other advantage is that this is organic which is what I strive for in my garden.
I can't overemphasize that your soil is the single most important part of your gardening experience. My wife and I visited Monticello - the beautiful Virginia estate of Thomas Jefferson several years ago.  The mansion was gorgeous as expected.  Mr. Jefferson was perhaps the first vegetable gardener of the United States and introduced a multitude of plants to the fledgling US.  His garden is nicknamed the revolutionary garden.  He had a garden built of enormous proportions on the side of the mountain on the property.  It is over 1000 feet long and takes your breath away when you see it.  His whole focus of the garden was his unbending belief that a healthy soil grows healthy plants.   From my experience, I couldn't agree more.