Search This Blog

Showing posts with label spring preparations. Show all posts

Thursday, March 4, 2021

Spring prepping has begun....

After a cold beginning, the temps rose quite rapidly yesterday once the sun rose into the beautiful blue sky. That's been a rare occurence around here lately. And, wanting to take advantage of this event, I decided to go out and get a head start on the many things I need to do. It will be time to start planting soon enough and one cannot waste a day like this.

So, my first decision was to move my veritical support poles to accomodate the cucumbers and tomatoes. I will once again employ the spring loaded string system I used last year. I had to move the poles about a foot in order to get them centrally located so I can plant a row of cukes and maters alternately down the row. This will allow me to use the rest of the bed for other plants. Haven't quite decided but I am thinking in terms of cooler weather crops. Maybe even carrots. I am hoping this will create a wall of green. I think it would look beautiful. Here are a couple pics of the supports.
Thumb of 2021-03-03/grdnguru/470fdbThumb of 2021-03-03/grdnguru/c026ab
The holes were 2 feet deep as they will need to carry a lot of weight. I can only hope it will work as envisioned.
After setting the poles in place, I decided to begin the process of cutting down the winter rye down so it can begin to break down into the soil. I used a grass trimmer to do this as I only wanted to cut the rye halfway down. It didn't take long and wow, the scent of freshly cut grass permeated the whole garden and beyond. I can probably say I was the first to cut grass in my community. My neighbors might say something different. It was a really nice scent that furthered my desire for spring to pop.
Here is a before and after comparison.
Thumb of 2021-03-03/grdnguru/21753b
Thumb of 2021-03-03/grdnguru/c41689
Again, I did not want to cut it down to the soil as that would result in both bleaching and a runoff (during rains) of the nutrients out of the soil. I want to feed it a little at a time. I will probably turn the rye totally under towards the third week of March. There are many ways to use rye as some gardeners/farmers cut the rye and use it as composting materials. Others let it decompose where it lays. Farmers, from what I can tell, cut the rye and leave the cuttings in place and allow the roots to breakdown in the ground. I use a spade or fork to just dig them up but not move them. I just lift up a little to allow air in to dry the roots. It seems to work so I will probably do that this year.
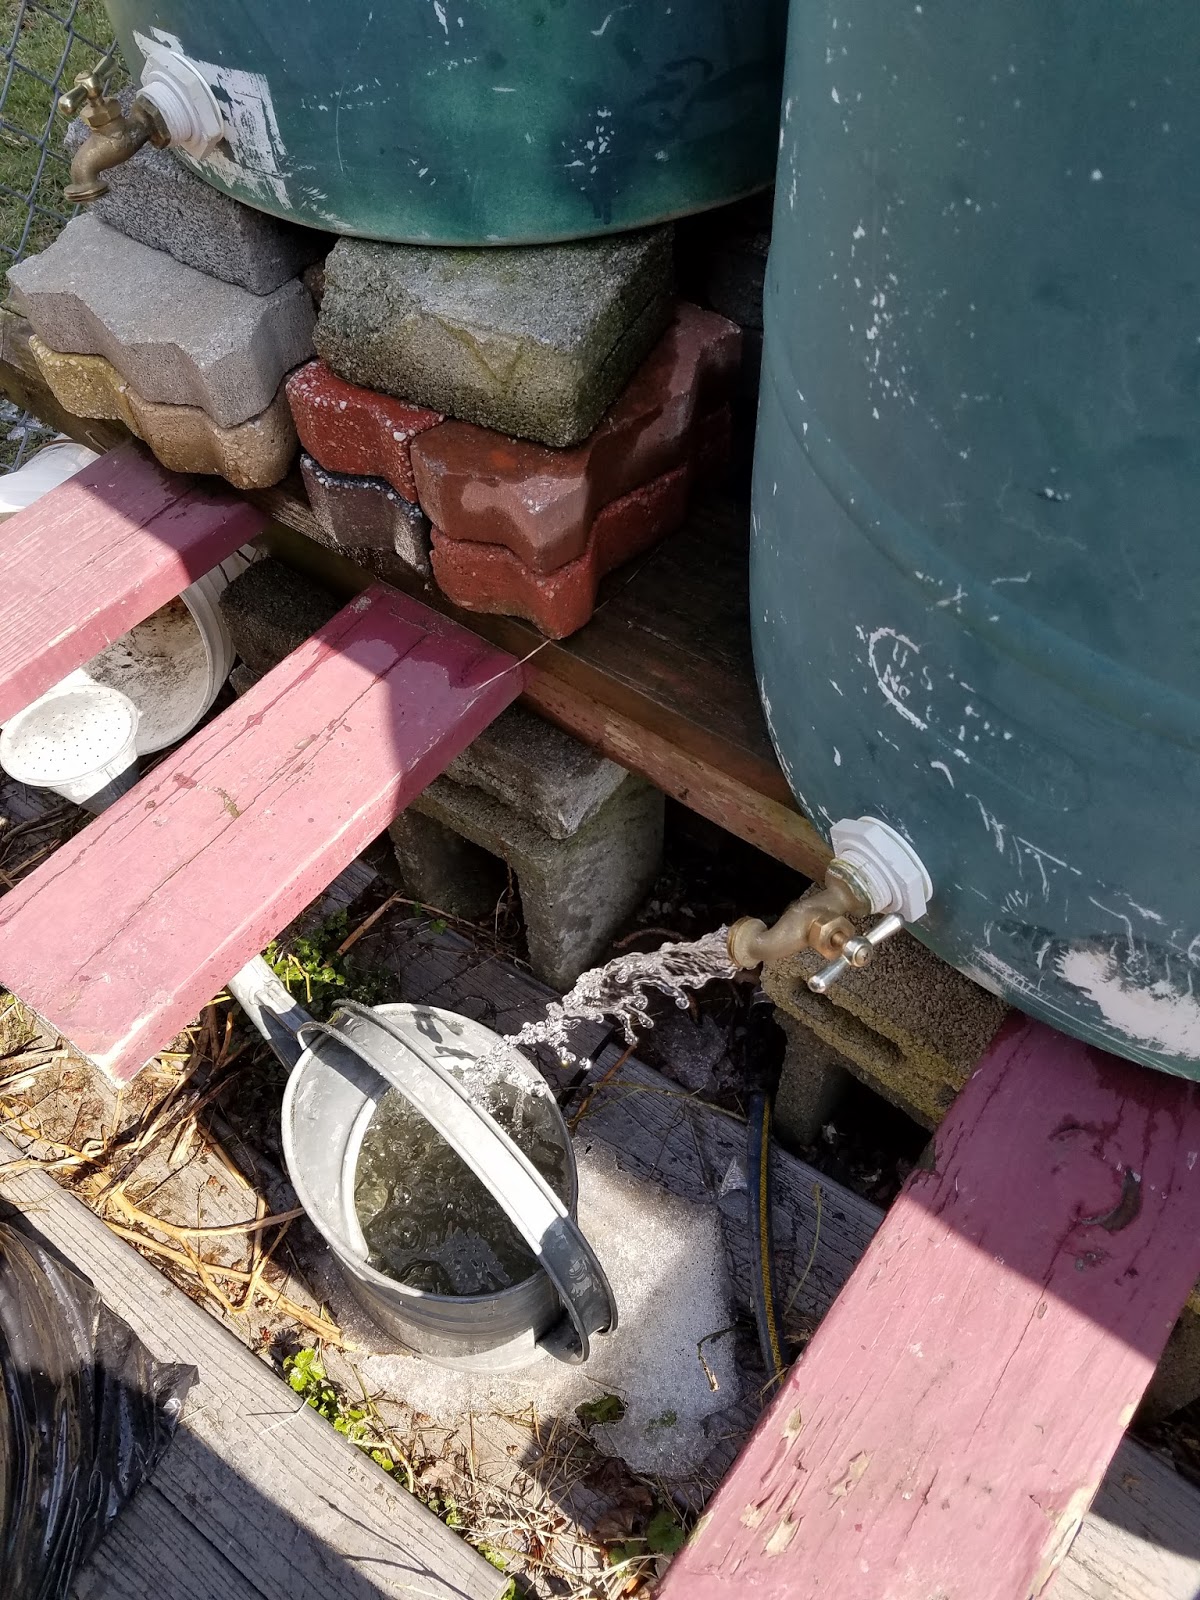
After doing these tasks, I cleaned up the garden area as winter has taken its' usual toll. I worked in the greenhouse for a bit to just get it ready for the seedlings which will need to be transferred to it in the coming weeks. I did check on my water container since it rained buckets over the weekend clear into Monday morning. Seems it was heavier than I thought.
Thumb of 2021-03-03/grdnguru/79ccfc
This is about 250 gallons of water. I can't remember having this good of a supply so early in the year. Considering that on February 26th, I had maybe, 90 gallons, this storm gave me about 150-160 gallons. That's a ton of water. I use the water mostly for the garden. But, I have been known to bucket water to clean our cars. It's chemical free so it has to be better than water from the faucet. The only issue is if it gets horribly warm, algae growths occur. I use a shock for pools which burns off in 1-3 days after application. I use the faucet when that occurs.
Well, that's about all I have at this time. Still much to do and I will be reporting on the seedlings that are growing in my basement in a subsequent post. I hope you are all getting back into the rythm of Spring. I think we all need it after everything that has happened. Nothing like working with plants and dirt to connect you to the earth. So, until next time, Happy Gardening everyone!

Sunday, February 17, 2019

Time to begin?

That's a tough question to answer.  The weather is at times saying yes and then cruelly, no.  We are currently at 43 degrees right now.  I walked out to my garden plots and the when I dug into the soil, it was cold and wet.  Not a big surprise as the weather has been quite seasonal.
So, what can be done given the soils are not ready for planting even the hardiest of seeds.  My answer is quite simple.  I will begin the process of clearing out my plastic greenhouse.  I placed one of my remote thermometers in it to get a gauge of what the temperature ranges are at this time.  Once the coldest temps are consistently above freezing, I will then set up the various hydroponic systems I have and  begin seeding in the early crops.  I was behind the curve the last time I planted in it and the crops bolted before I could get a decent crop produced due to too much summer heat.  It's a delicate balance to get the seeds in at the right time.  One season is not like the other in this area. 
I did a little cleaning around the beds when I was outside Saturday morning.  The rains and snows took a little toll on the them.  Nothing huge as everything looks to have come through the winter.  The winter rye is in a sort of dormant state but that will change with a few more weeks of 50 degree weather.  It will be soon enough before I have to cut the rye and start working it into the soil.
I also eyed up the area where I will be building the glass greenhouse this spring.  Lots to do there so I just need to start chipping away at that in small chunks.  The next step is to remove the bricks and paver stones in the area of the greenhouse floor.
Once those are removed, I can then use the rototiller to break up the ground where I will be starting the base of the unit.  That won't be for a little while yet as the ground is wet and we are expecting some freezing temps in the near future.
I took out some kitchen scraps this afternoon and buried them in the unfinished composter.  I did this in order to get the processes moving to create bacteria once the temps moderate.  There will be slow decomposition for now and even that is fine.  It was deep enough to perhaps awaken or feed the existing microbes that exist that far down.   
It was nice to get out in the yards and tool around the various points to get the gardening juices flowing again.  Spring is about a month or so away but hope has been rekindled.  It should be an interesting year given my focus on making the garden contribute to our household.  There is  big difference between gardening as a hobby and gardening to augment our food supply.  We shall see how it turns out.  It is a challenge for sure.  So, there is where the gardening progress is at this point in the year.  Till next time, Happy gardening everyone!

Tuesday, February 13, 2018

Early Spring?

In what one can only describe as an early spring here, we had unseasonably warm and wet weather here over this past weekend.  It was in the mid to upper 40's here on Saturday.  It began to rain mid day Saturday and really didn't stop from there on.  Sunday was even warmer as the temps went up the the low 60's.
Given this rain was predicted, I went out to my rain barrels and composters on Sunday morning in between downpours to set them up.  I took the lids off of three of my composters to allow the rains to soak the leaves and compost to get them active again.  I then hooked up two rain barrels to give me water to clean them out.  I did this so I wouldn't have to drag hoses out given they are put away for the winter.  Every drop counts as they say!
Not much has been going on with the actual garden as it is still very much winter here.  When I went out to my garden on Sunday morning, my shoes were sinking into the muddy ground.  I wont be venturing out there over the next couple of days to allow the ground to dry out some.  But one certainly can't tell it is winter by the weather we are having.  The long term forecast is for our temps to be about 10-15 degrees warmer than normal for the next 15 days.  This is the same pattern we had last year, and just like last year, I am chomping at the bits to plant some early season crops.  I am on the fence this year as I remember my remorse for not planting aggressively last year.  I still have a little time to ponder that - but not much.
And, speaking of time, I will be starting the construction of my new greenhouse soon enough.  It won't be this weekend as the weather forecast is for rain to start on Friday and probably not end until the following Monday.  Looks like it will be another indoors weekend.
I will most likely begin planting root crops in my hydroponic system sometime this week.  It is located inside a poly greenhouse that I have in my backyard.  It's next to my shed so it is not affected by winds and actually keeps the low temps about 6-10 degrees higher than the actual lows.  The nightime projected temps here are supposed to be in the mid to upper 30's according to the National Weather Service so I should be fine. 
I hope you are beginning to get excited about gardening for another season.  It certainly is time here in the mid-atlantic for it.  Until next time, Happy Gardening everyone!         

Tuesday, April 4, 2017

It's getting there

Sunday was a fairly nice day all-in-all.  The weather was improved over Saturdays' chilly day that had a consistent wind which was not all that inviting.  So, I decided to take advantage of the sunnier and warmer afternoon Sunday and begin to get things moving.  First order of business was to cut the winter rye down that I had planted in the late fall.
The rye really took off over the last month so that proved to be a great bonus.  As can be seen, it was quite high thanks to the weather.


So, I proceeded to cut the various beds down in order to stunt their growth.  The idea here is to begin the process of getting the decomposition process started and not to cut the rye down all in one time. But rather, to do it in stages so as not to relase all the nutrients at one time.

 I stopped the process here in order to take a picture to show what I mean by cutting the rye down.  I purposely left about an inch or a little more uncut.  One point here also is that I cut the grass using hand held scissor trimmers.  This results in less of the grass being thrown everywhere and getting more of the rye to stay in the beds.  And, I get my share of exercise in the early Spring sun.  A string trimmer just launches the grass all over and a good portion usually lands outside the beds.
Once it is cut, it should look like the following:
 Once the cutting is completed, you should water the grass to speed up the breakdown of the material.  I will follow up with a mid week watering.  You don't have to soak the beds but rather, you should be watering just enough to moisten the cut grasses only.
Once that was completed for all three beds, I took a little rest and then decided to check the winter salad garden I have had.  I knew I needed to water it given the warmer temps we have been having. So, here is what I uncovered.


Everything looked better than anticipated.  My plans are to cut the lettuces and the spinach plants in the first two rows and then pull them out.  I need to make room for Broccoli and Cabbage at this point which will need covering for the next month or so.
After watering them and covering them back up, I decided to look in my shed to locate the plastic along with the tube supports to build temporary shelters for early start lettuce and spinach plants.  I usually plant these crops in my hydroponic systems but I have another use for that system this year.  And, given the other two gardens I have at my disposal - a total of about 5 K square feet - I have ample room to grow whatever I want in those.  I also have a small plot in the community garden I assist with in which I can plant about 32 more sq. feet of plants.  This year will be very challenging for me to fill all this space.  A nice issue to have but it can be overwhelming.  One thing is for sure, I will be very busy this year.
I pulled out various items and found my 5 plastic mini greenhouses that will allow me to cover up seedlings or plant seeds directly in the ground while not being concerned about freezes that can occur. That will be more than enough for my purposes.  The mini greenhouses are shown below.


They have vents and are high enough to allow for substantial growth of the plants in them.  I will probably use them to begin early season plants from seed.
I also have supports and the plastic to cover them that I can use to cover about 32 square feet of space.  I will have to set them up and then decide, given all the new found space I have, what plants I will grow.  My main goal this year is to have a balanced crop of which we can put up some for over the winter.
The season is upon us and there is much to do.  Hopefully, I can get it all done,  Until next time, Happy Gardening everyone!


Sunday, March 19, 2017

Tomatoes!!!

I started 16 tomatoes from seed this past Wednesday.  I used the Jiffy seed pellet system you can find at almost any home improvement store and maybe a few grocery stores.  Having never used them before, there was a little intrepidation on my part.  So, I followed their instructions and set my seed in each moistened pelet and covered them with the supplied lid.  It made a mini greenhouse that held the moisture in.  I placed the greenhouse on top of our refrigerator and let them sit there until Friday night.
At that point, there was only one packet that had shown a shoot coming up out of it.  I decided to put them into a warming greenhouse seed starter to give them heat to help along the process.  I have had that system for probably 8 years so far.  So, I put them into the warming tray without the top and filled the warmer bed with water on Friday night.  As can be seen from the picture below, there was great progress made over the weekend.


There are 15 of 16 pellets that have plants growing from them.  Given there are various types of tomaotes here, I am pretty sure all will be showing growth within the next day or so.  Now, I have to put these under light in order to allow them the necessary light to grow.  I will wait another day or so then transfer the set of these to the lights.  They will need lots of light - approximately 12-14 hours a day.
I started another set of 18 paste tomatoes and another set of 6 mixed variety tomaotes last night. They can be seen in the backround of the picture above.  My plan is to also begin pepper plants once the tomatoes are moved under light so I can use the warmer for them.  One thing at a time.
It may seem that 40 tomatoes are a lot and I have to admit, it is.  Last year I had 3 paste tomato plants and the they gave an uneven harvest so I am hoping the 18 will give us enough to put up in the fall.  I have never done that before so hopefully we will get the harvest we need and we can learn how to put them up for winter use.
On another note, I went out to check on the state of my little salad garden I have had over the winter. Much to my surprise, they came through the snow and cold temps with great result.  As can been below, all the plants are still healthy at this point.  Even the mesclun lettuce in the lower right corner looked ok and is showing sings of producing a second set of lettuce.
We have had several salads from this bed over the last few weeks.  I'll continue to water and see if we can get pehaps another salad or two before I dig it up for the sping.  I was able to get water from my now three filled 55 gallon water barrels.
The water was cold but it was clean.  And, it's free!  I usually dont have my barrels up and running this early but last year, we had tons of rain until the end of May then pratically nothing.  So, I decided to set them up and we have had several long rainy days so now, they are full.
Another item of interest for me and hopefully you is that my winter rye has taken off quite well this Spring.  As you will notice, it has grown a lot since the last time I looked at it.
It's a lot thicker and taller than my last visit which means I will have more green manure than I anticipated I would have had at this point.  Credit the unusually warm weather and a lack of aprreciable sonwfall.  Not really sure I should be happy about that given the beneficial effects cold weather and snow have on the pest populations around here.  But, I will take what God gives.
That's all I have at this time.  The new season is getting underway and that makes a gardening nut like myself very happy.  Until next time, Happy Gardening everyone.

Saturday, August 13, 2016

Blossom End Rot - scourge of the tomato.

"Failure of one thing is repaired by the success of another."  Thomas Jefferson, Garden Book,1809

I don't think that there is anything more disheartening than putting in the planning, exerting the labor and tending to your tomatoes only to have them end with Blossom End Rot.  Although this malady of the soil can occur on other plants such as squash, peppers and even watermelons, it is most associated with the tomato plant.  That may be because the tomato is likely the most planted vegetable across all gardens. 
Unlike Mr. Jefferson's outlook, to have it all end with a black, soft spot on the end of your tomatoes is an almost epic failure in most gardeners opinions.  But, is there really anything a gardener can do to decrease the chances their tomatoes won't be beset by BER?  Thankfully, the answer is that there are certain steps that can be implemented that will reduce the occurrence drastically.
In order to defeat this scourge, one has to understand the origin of it and the complex nature of the issue. Blossom End Rot is often mistaken as a fungus or pest issue by gardeners.  If they see it, they will spray their plants with pesticides or fungicides to combat it.  When in fact, BER is really an environmental soil issue.  Once detected by sight on the fruit, it is almost impossible to correct the situation in time to save the rest of the crop.  
Rot occurs under certain identifiable soil and weather conditions.  Calcium deficiencies and long periods of wet weather are the main culprits that bring on rot.  While one cannot control the weather, you can control the structure and mineral content of your gardening soil to manage it.  As with any issue of the soil, it is best to start with a soil test.  Preference here would be to submit your soil samples to the local extension service instead of using the do it yourself kits that are available.  The extension services often will give you concrete steps to take which is based on their many years of experience.
If the soil test showed a calcium deficit, you will likely will be advised to add limestone to your soil.  If there was too much, you will told to add gypsum.  The test may even show you have the necessary calcium and nutrients for your plants.  The rot may have occurred because your plants cannot access either due to other practices.
Whichever your results are, the next step is to build up your soil structure.  As alluded to earlier, BER can be the result of your plants inability to take up the calcium and nutrients present in the soil that they need.  They are blocked by other less noticeable issues.  This condition is generally brought about by poorly draining soil, the use of high nitrogen fertilizers or salts and/or irregular watering practices.
Poorly draining soil can be best addressed by adding organic matter to your beds in the spring before planting begins.  It can take the form of almost any amendment offered.  Compost is perhaps the most used one.  Either buy a OMRI rated compost or use your own if you practice composting.  Others would be composted cow manure, mushroom compost or leaves.  One caveat here.  When buying commercially produced amendments, look for the OMRI certification to insure you have a clean product for your garden.  No sense in introducing harmful pathogens into your garden. 
Adding organic matter addresses a multitude of issues that can occur in your soil.  It both allows your soil to hold the necessary moisture, and it also structurally allows it to drain the excess off.  It adds nutrients to your soil that are slowly released to the plants too.
With tomatoes, an even watering pattern will go a long way to lessening the chances of Blossom End Rot.  Uneven watering does not allow the roots to supply the fruit with the balanced nutrients required for successful maturity.  A balance must be maintained between your watering and the rains you get.
Another step that can be taken is to mulch around your tomatoes.  This results in the maintenance of a constant soil moisture and temperature.  Mulch has the side benefit of also depressing the occurrence of disease transfer from the ground to the plant leaves when it rains or you water in the garden.
Another practice to stem BER is to rotate your crops each year so the plants are not being grown in the same plot year after year.  Different plants deplete different nutrients throughout the growing season.  Rotating also reduces the opportunity for diseases and pests to become prevalent in the garden.  
One last trick that can be used is to spread dolomitic lime into the hole you are transplanting your tomato seedlings into.  Then cover the lime with native soil and transplant the tomato.  This will allow for a ready supply of calcium right at the root zone.  You can also spread a little of the lime on the top of the soil for an added boost later.  
These are the most effective known methods and practices any gardener can take to insure the best possible outcome for your tomatoes.  Using any combination of these will significantly decrease the occurrence of Blossom End Rot in the garden.  I hope this has been helpful and that it will ensure you great tomato crops in the future.  Happy Gardening everyone.         

Sunday, April 19, 2015

Its been hectic!

Well, it's has been a while and I certainly apologize for that.  My job has been hectic, work in the garden has ramped up immensely and best of all, my son is getting ready to graduate from college very soon. So, to say life is rolling along would be an understatement.  But still, I do have to apologize for going off the grid for this timeframe.  I will endeavor to be more consistent in the future.

So, garden-wise there have been some successes and alas, failures.  Failure, in one respect or another, is part of the vegetable gardening world.  This failure is really not that big in the whole scheme of things although it is disappointing.  As I have related to you, my goal with my gardening is to stay "organic" in all things.  Last fall I researched various fertilizers to use in the starting of my plants. I switched to an "organic" fertilizer from my preferred one which wasn't certified organic.  After having used this one this year, I would say it was a big let down in regards to my pepper plants.  I am not sure why it didn't feed them enough nutrients, but their growth seems very weak.  My tomatoes seem to be a little behind but not so far behind as the peppers.  Now, if these were the plants I was depending on for my food source this year, then that would be a huge issue.  As it is, my remedy for the situation is to run down to my go to plant supplier and buy theirs.  Of course, this means I will have to substitute their variety for mine, but that is the price to pay this year.  A minor price no doubt.

I finally finished the reconstruction of my beds that I started last fall yesterday.  I will get pictures up shortly once I have plants in them so you can get a sense of what my garden looks like.  Yesterday was one of those days you only get 4-5 times in spring or summer - maybe.  Beautiful sunlight, mild temperatures and a very gentle breeze.  To say I was in my element is an understatement.  I did my sniff test just to jog my brain out of it's doldrums.  What a sweet aroma it has.  All the winter rye has broken down and the beds are now ready for the year.  The soil is a nice dark brown, still cool to touch and friable.  Just the way you want it now.  

I built a structure over the area where I am planting my cool crops this year.  I will need to shade the plants from the sun towards the end of their growing cycle.  I had some left over weed fabric that I tested and it worked pretty well,  Light got through it and at the same time, it shaded the area.  I tested the soil this morning with my hand test and the soil under it was noticeably cooler than the surrounding uncovered areas.  I planted 3 cabbages and will be adding cauliflower and broccoli in the next couple of days.  I'll let you know how this works out in future posts.

Well, that's all I have at this time.  There is so much ground to cover when it comes to vegetables that it is nearly impossible for me to know what you may be interested in at this time.  Let me know and I'll be sure to address it in one of my upcoming posts.  Till the next post, keep on gardening! 

Monday, March 23, 2015

Continuing preparations

Well, we received another reminder this past Friday that winter is not yet through with us.  It was more of a nuisance than anything else but, nonetheless, it was a snow event.  Today, as I sit out in my back porch, the sun is shining very brightly and its in the mid 40's.  I have been able to get the garden moving in several respects this weekend due to two beautiful days.
In my last post, I mentioned that I planted winter rye and the reasons for doing so.  Last fall (September) I sowed the seed and then covered one of my beds with greenhouse plastic and the other I left to the elements to see if covering it would make a difference.  As shown, the answer is a definite yes as seen by the two photos below.  The top one is of the uncovered bed and the bottom one is of the bed that was under a plastic tunnel all winter.


It was worth the effort to cover them as there is certainly more volume of rye to work into the soil.  I cut the first bed by using my weed trimmer.  I cleaned the trimmer and used new line on the trimmer to prevent any weed transference to my beds from the trimmer.  The picture below shows the bed after this cutting.

I will let this lay for a couple of days as seen and then I work it into the ground through shallow cultivation.  This process allows for the break down of the rye and also leaves the roots system somewhat in tact below. This adds structure and concurrent moisture retention with the gradual breakdown of the roots into the soil.  One other advantage is that this is organic which is what I strive for in my garden.
I can't overemphasize that your soil is the single most important part of your gardening experience. My wife and I visited Monticello - the beautiful Virginia estate of Thomas Jefferson several years ago.  The mansion was gorgeous as expected.  Mr. Jefferson was perhaps the first vegetable gardener of the United States and introduced a multitude of plants to the fledgling US.  His garden is nicknamed the revolutionary garden.  He had a garden built of enormous proportions on the side of the mountain on the property.  It is over 1000 feet long and takes your breath away when you see it.  His whole focus of the garden was his unbending belief that a healthy soil grows healthy plants.   From my experience, I couldn't agree more.